Practice Setup
Offer adults and children their own forms from one link
Let adults and children, or individuals and couples, each get their own registration, consent and forms from the one intake link you already share, using your cover page.
8 steps · 3 min read
Checked against the product on .
Offer a choice on your cover page
Your cover page is the page your usual intake link opens. Each choice on it opens its own pathway, with its own registration, consent and forms.
8 steps2 partsOnce
How it fits together
- Your usual intake linkThe one on your website, your QR code and your referral replies. You share only this link.
- Your cover pageThe page that link opens. With two or more choices, the client picks the one that fits them.
- A pathway for each choiceWhat that client is asked, in this order. Guide: Set up a patient intake pathway.
- RegistrationThe client’s details. Guide: Turn on your registration form. For children or couples, a registration of their own: A registration for children, A second registration, such as for couples.
- ConsentThe forms the client reads and signs. Guide: Review your consent forms.
- FormsThe questionnaires and practice forms, such as SNAP-IV for a parent. Choose them in the pathway, or save a set once: Save a set of forms as a battery.
You set them up in the opposite order: registration and consent, then the pathway that asks for them, then the choice on your cover page (Part 1 below).
When to offer choices
- Adults and children: a parent or carer registers the child and gets parent forms, such as SNAP-IV, instead of the adult questionnaires. Follow Add a choice for children instead of the steps below: it ends with the choice on your cover page.
- Individuals and couples: couples get their own registration. Set it up with A second registration, such as for couples.
- Different services, such as an ADHD assessment and general therapy, each with its own forms. Up to 6 choices.
Before you start, have these ready, in this order
- Your registration form, set to Active on the Forms page: Turn on your registration form.
- For a choice for children, a registration whose Who it’s for is Children and young people: A registration for children.
- Each consent form a pathway asks for, reviewed and set to Active: Review your consent forms.
- A pathway for each choice, set to Active: Set up a patient intake pathway.
Part 1. Add a choice
Step 1: On the Forms page, under Pathways, find the Your cover page card.
You see: your link, with Copy link and QR, and the choices clients see, if any.
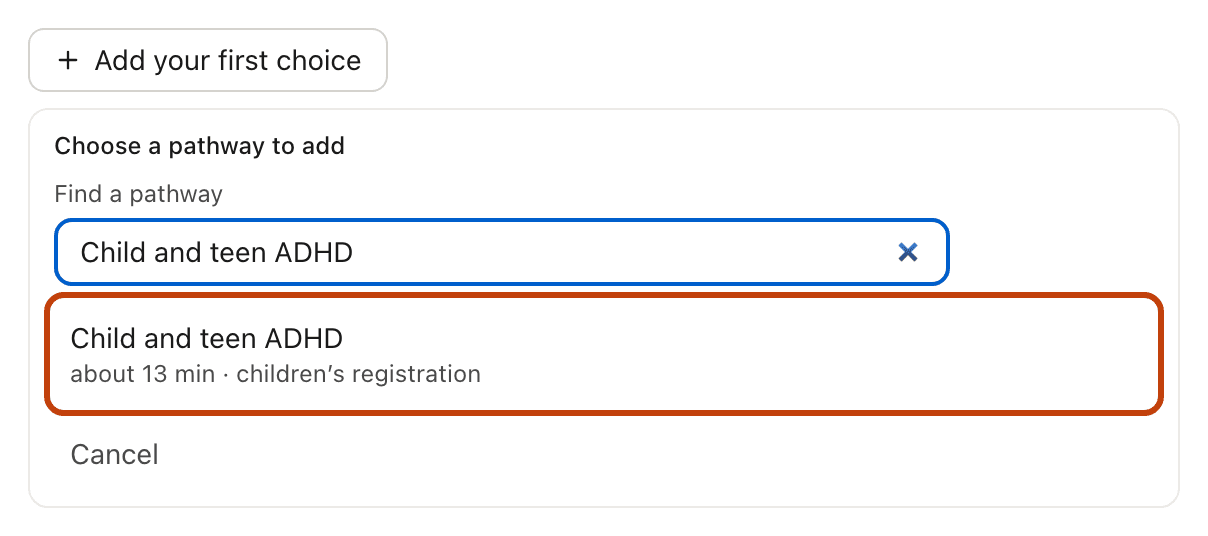
Step 2: Press Add a choice. With nothing offered yet it reads Add your first choice.
You see: “Choose a pathway to add”, with each pathway’s minutes and registration.
With more than 7 pathways, a Find a pathway box appears. Type a few letters of the name.
Tap the image to open a larger copy in a new tab.
Step 3: Press the pathway for this choice.
You see: “Adding”, its name, and a box What clients see.
Step 4: Type the words clients see for this choice, or leave the box empty.
You see: your words in the box.
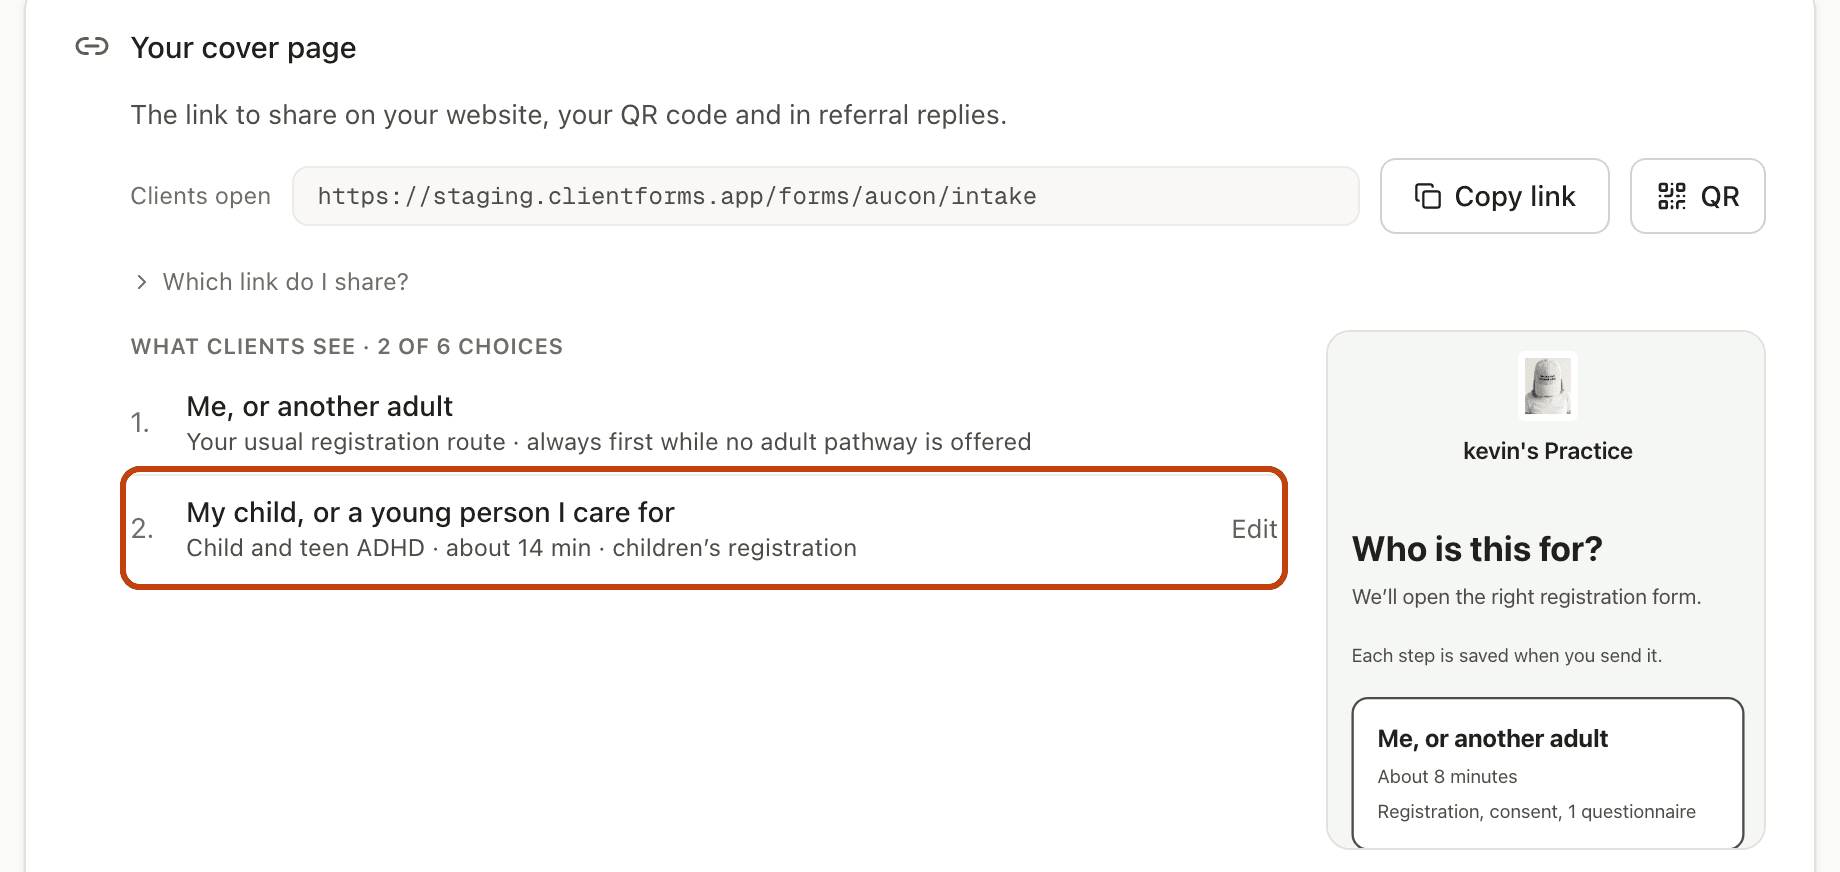
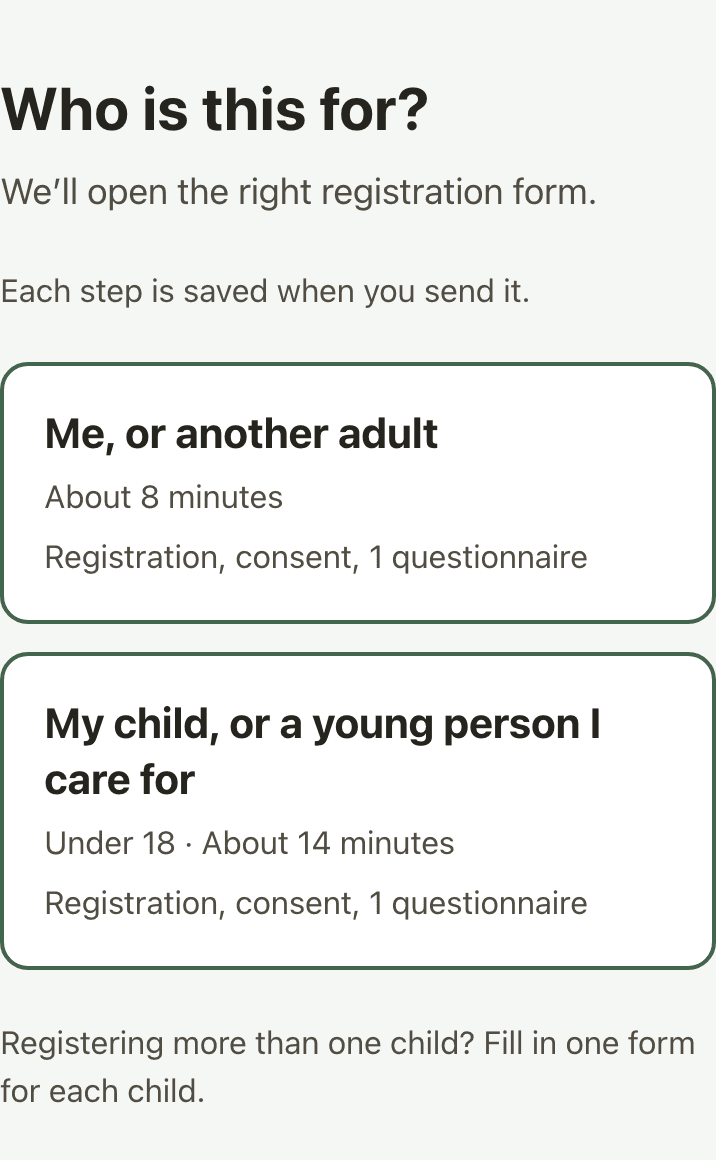
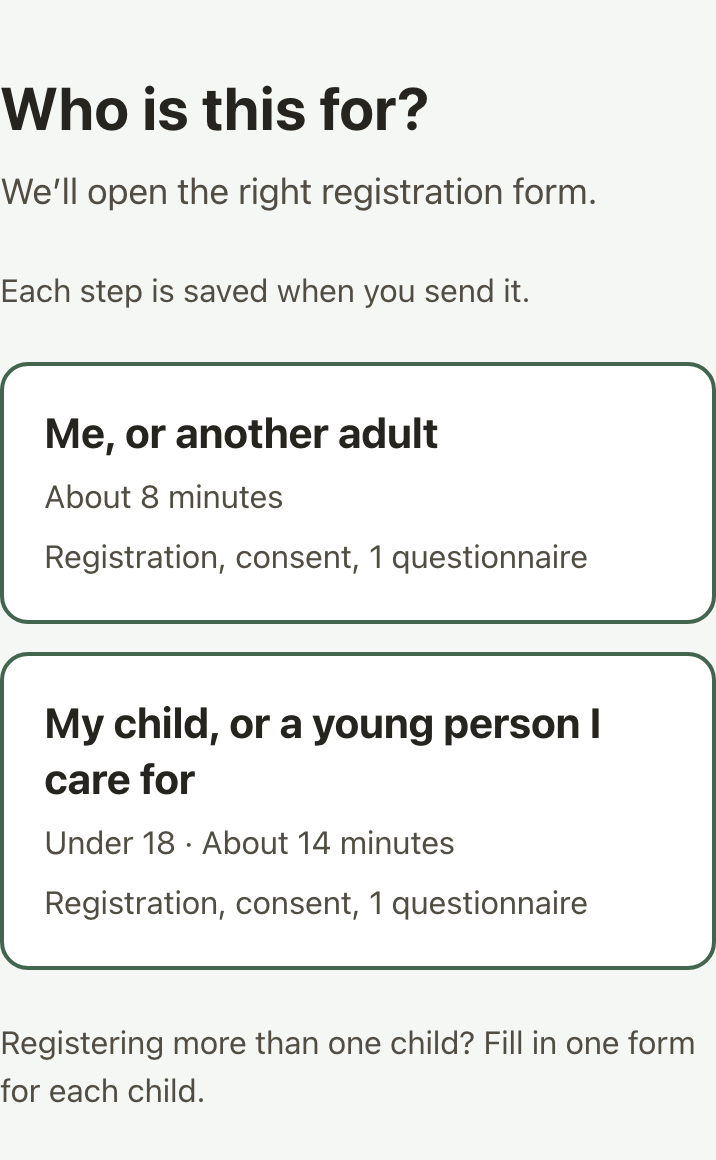
Left empty, an adult choice reads “Me, or another adult” and a children’s choice reads “My child, or a young person I care for”. With only those two, the page asks “Who is this for?”. With your own words, it asks “Which of these fits you?”.
Careful: The next step goes live
Every new client who opens your usual intake link sees the choice straight away. To take it off, press Edit beside it, then switch Offer on your cover page to Not offered.
Step 5: Press Add to cover page.
You see: a message starting “Added” for a moment, and the choice in the list. (Your own word for clients may show in place of clients.)
Tap the image to open a larger copy in a new tab.
Saved so far: the choice is live on your cover page. You can stop here.
Part 2. Check what clients see
Step 6: OptionalIf you offer two or more pathways, use the arrows beside a choice to move it up or down.
You see: the choices numbered in the new order.
While both choices keep their usual names, adults stay first and there are no arrows.
Step 7: Press Preview what clients see.
You see: in a new tab, your choices in order, each with its minutes.
Close the new tab when you have looked.
Tap the image to open a larger copy in a new tab.
Step 8: Share the same link as before: Copy link, or QR for a code to print.
You see: nothing new to send out. The link on your website and QR code now open your choices.
Good to know, only if it happens
- One choice, or none
- With one choice, clients go straight to it and see no question. With none, the link opens your Default pathway while it is Active, otherwise your registration form.
- From a pathway
- Each pathway has an Offer on your cover page card. Switching it to Offered adds the same choice.
- A pathway’s own link
- Skips the cover page and opens that pathway. Use it when you already know which pathway a client needs.
- Change the words
- Press Edit beside the choice, then change What clients see in its Offer on your cover page card.
- Cover page full
- It holds 6 choices. To add another, take one off first.
- Registration turned off
- Clients who open your link see “This form isn’t available right now” until you turn your registration form back on.
Done when your usual intake link shows your choices on your phone.
Related guides
Set up a patient intake pathway
Combine intake, consent, admin forms, and assessments into a single link patients complete before their first appointment.
Turn on your registration form
Switch on the form new clients fill in about themselves, and choose what it asks.
Review your consent forms
Your practice starts with consent and admin forms already drafted. Read each one, change what you want, and make it live.
Share your onboarding link
Your permanent practice link. Patients register, sign consent, and complete forms without you creating their record first.

Ready to try a different approach?
Calm forms for the people filling them in. Scored results and reports for you.
Full Professional access for 30 days, no card. Then a free plan with 3 forms and 10 responses.
Quiet design. Real impact.